Siteimprove Integration
Overview
Cascade CMS's Siteimprove plugin allows existing Siteimprove customers to access data from the Siteimprove Intelligence Platform from within the CMS. It enables you and your team to review the quality of your content and correct content quality issues related to accessibility, broken links, SEO, and more within your CMS authoring environment.
The plugin overlays data whenever you visit a Page within a Site where the integration is enabled. It is made up of three areas:
- A Live page score and lists of issues with content quality
- A Prepublish view with the ability to check content before it goes live and highlight relevant issues on the page (additional subscription required)
- Unpublish risks to assess the risk of unpublishing or removing a page from your site when it comes to SEO and broken links
The Siteimprove integration provides insights into:
- Accessibility issues
- Misspellings and broken links
- Readability levels
- Policies - how well the content adheres to any organization specified policies
- SEO: technical, content, UX, and mobile
- Page visits and page views
- The impact of unpublishing a specific page
The exact layout depends on which modules you have enabled in Siteimprove.
Enabling the Siteimprove Integration
At the System Level
To enable the Siteimprove integration for your environment:
- Click the system menu button ( ) > Administration > Preferences > Integrations & Plugins.
- Under Siteimprove Settings enable the Enable Siteimprove Plugin option.
- Optionally, enable Do not include "index" in Siteimprove URLs.
- Select this option if the index pages for your site appear as https://www.example.com/about/ in Siteimprove as opposed to https://www.example.com/about/index.html.
- Submit your changes.
At the Site Level
To enable the Siteimprove integration for a site:
- Ensure the Siteimprove integration is enabled at the system level (see above).
- Navigate to Manage Site > Site Settings.
- Toggle the Enable Siteimprove Integration option.
- Submit your changes.
At the Site Role Level
To enable User/Group access to the Siteimprove overlay:
- Ensure the Siteimprove integration is enabled at the system and site levels (see above).
- Review the Site Roles assigned to your site under Manage Site > Site Settings > Roles.
- Edit the appropriate Site Role under Administration > Roles.
- Toggle the Access the Siteimprove integration ability.
- Submit your changes.
Logging into the Siteimprove Integration
If you have a user account in Siteimprove, you can log into the Siteimprove overlay with your credentials after it has been enabled. Your user role and permissions in Siteimprove will determine which sites you can see data for in the overlay.
To log in to the Siteimprove integration, navigate to an enabled site and you'll see the Siteimprove badge on the right-hand side of the interface:

After clicking here, you'll be prompted to enter your Siteimprove credentials.
Viewing Siteimprove Data
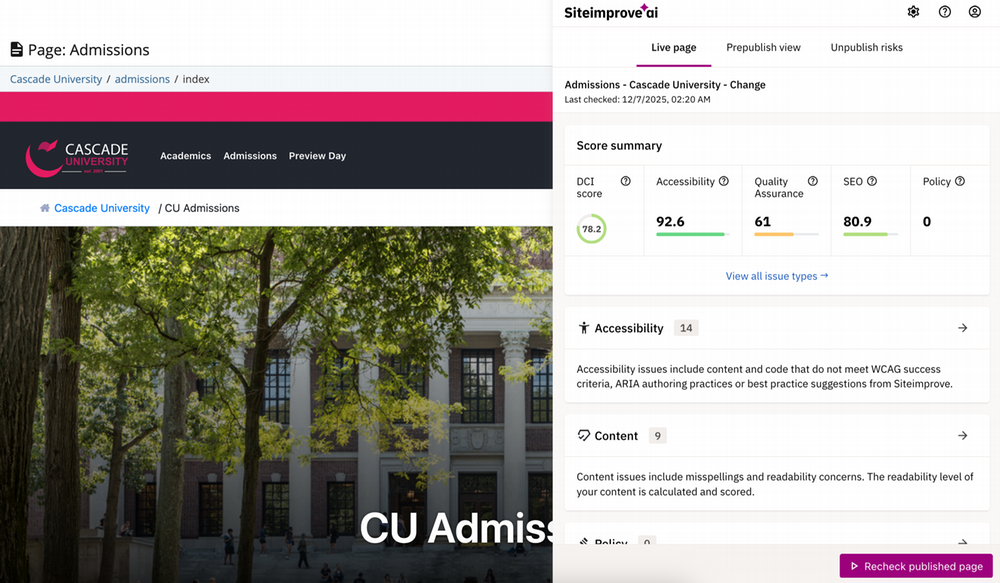
To view Siteimprove data for a page, navigate to the page within Cascade CMS and open the overlay by clicking on the Siteimprove badge.
If you're not seeing data for your page in the overlay, ensure that:
- Your site has been imported into your Siteimprove account.
- The Site URL for your site in Cascade CMS is the same as the URL that appears in your Siteimprove inventory. If not, set the Siteimprove URL in Site Settings.
- Your page has been published.
- Your page has been crawled by Siteimprove and appears in your inventory.
Sending Re-Check Requests to Siteimprove
Publishing a page will send a recheck request for the page to Siteimprove. You can also use the Recheck published page button at the bottom of the Live page tab of the plugin to send a manual request for Siteimprove to recheck the content on the live site.
Publishing a Folder, Site, or Destination will send a recheck request for all successfully-published pages contained in the publish job.
Configuring your Siteimprove URL
If the URL of your site in Siteimprove is different than the Site URL of your site in Cascade CMS, specify your Siteimprove URL under Manage Site > Site Settings > Siteimprove URL.
Deep Linking in Siteimprove
To make correcting issues in your content easier, Siteimprove offers "CMS Deeplinking". Deeplinking creates links to your page assets in Cascade CMS from within reports in your Siteimprove account. To do this, the Cascade CMS ID of your page assets needs to be included in the page's published source.
You can include a page's ID in your Template(s) with a simple region and Velocity format:
-
Create a Velocity Format containing the following:
<meta name="id" content="${currentPage.identifier.id}"/> -
Create a new region within the
<head>tags of your Template(s). Example:<!-- Page ID for Siteimprove deep linking. --> <system-region name="PAGE_ID"/> - Attach your Format to this new region in your Template(s).
- Publish all pages that use the Template(s) to ensure that your page ID
<meta>tag gets included the pages on your web server.
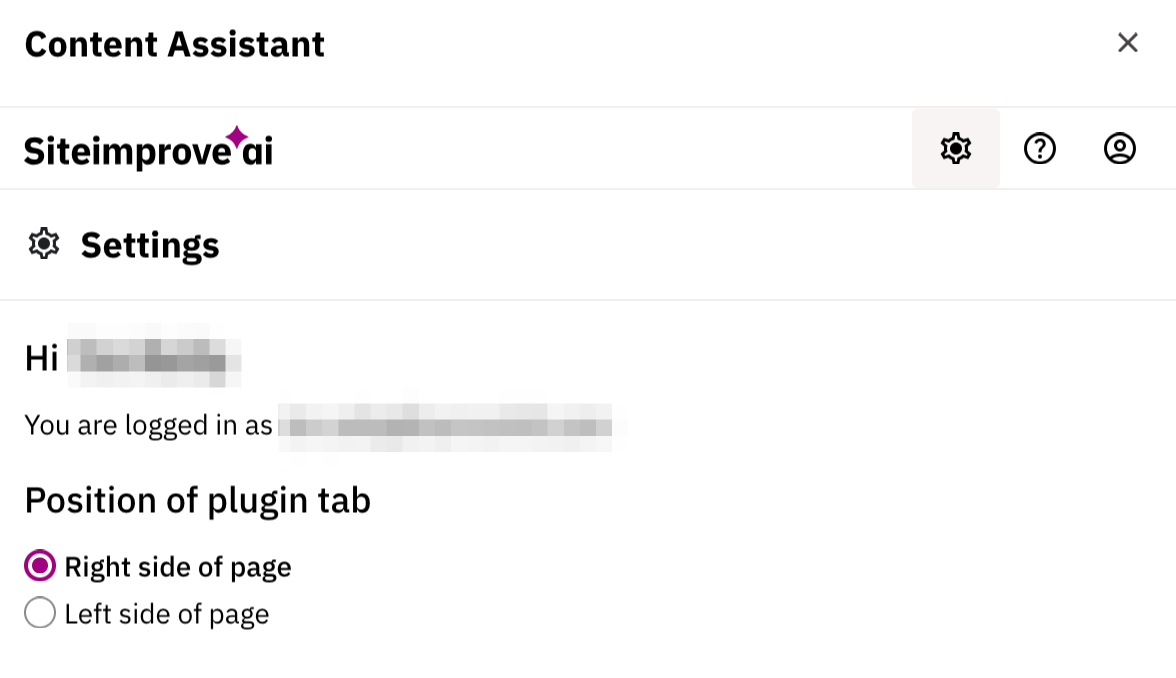
Local Plugin Settings
To adjust your personal plugin settings, click the Settings icon in the top right corner of the plugin frame. Here you can choose whether to have the overlay displayed on the right or the left side of the content window.
Siteimprove Prepublish functionality
Siteimprove is capable of checking content before it is published using its Prepublish feature. This feature is a separate paid service. Contact your Siteimprove customer success representative to find out more.
To enable this functionality for accounts with a valid Prepublish subscription:
- In Siteimprove:
- Ensure that your account has the Prepublish functionality enabled.
- Locate/Create a Siteimprove API user with the "admin" or "owner" role.
- Create API credentials for that user (Main Menu > Integrations > API).
- In Cascade CMS:
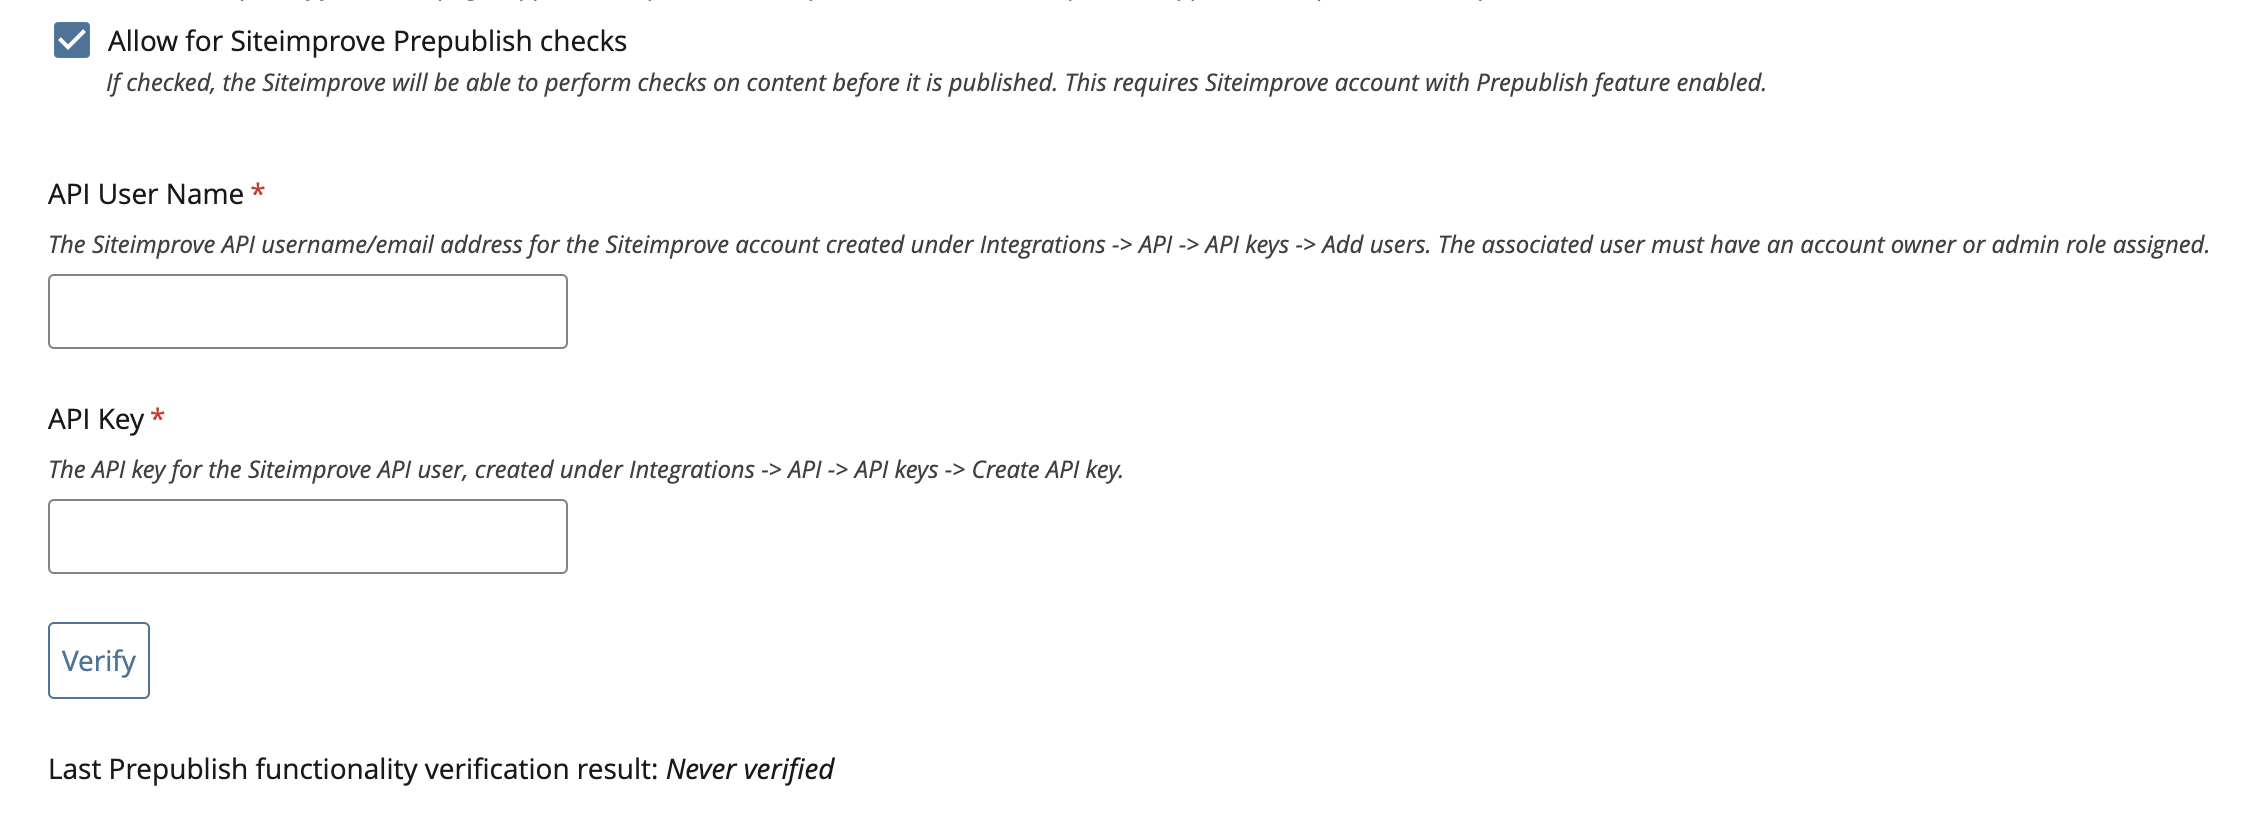
- In the Siteimprove Settings, check Allow for Siteimprove Prepublish checks (as seen in the image below).
- Provide the API user credentials for the Siteimprove API user.
- Click the Verify button to verify the Siteimprove account.
- Click Submit. (Note: errors usually indicate that the Prepublish feature is not enabled or that the wrong API key was input)
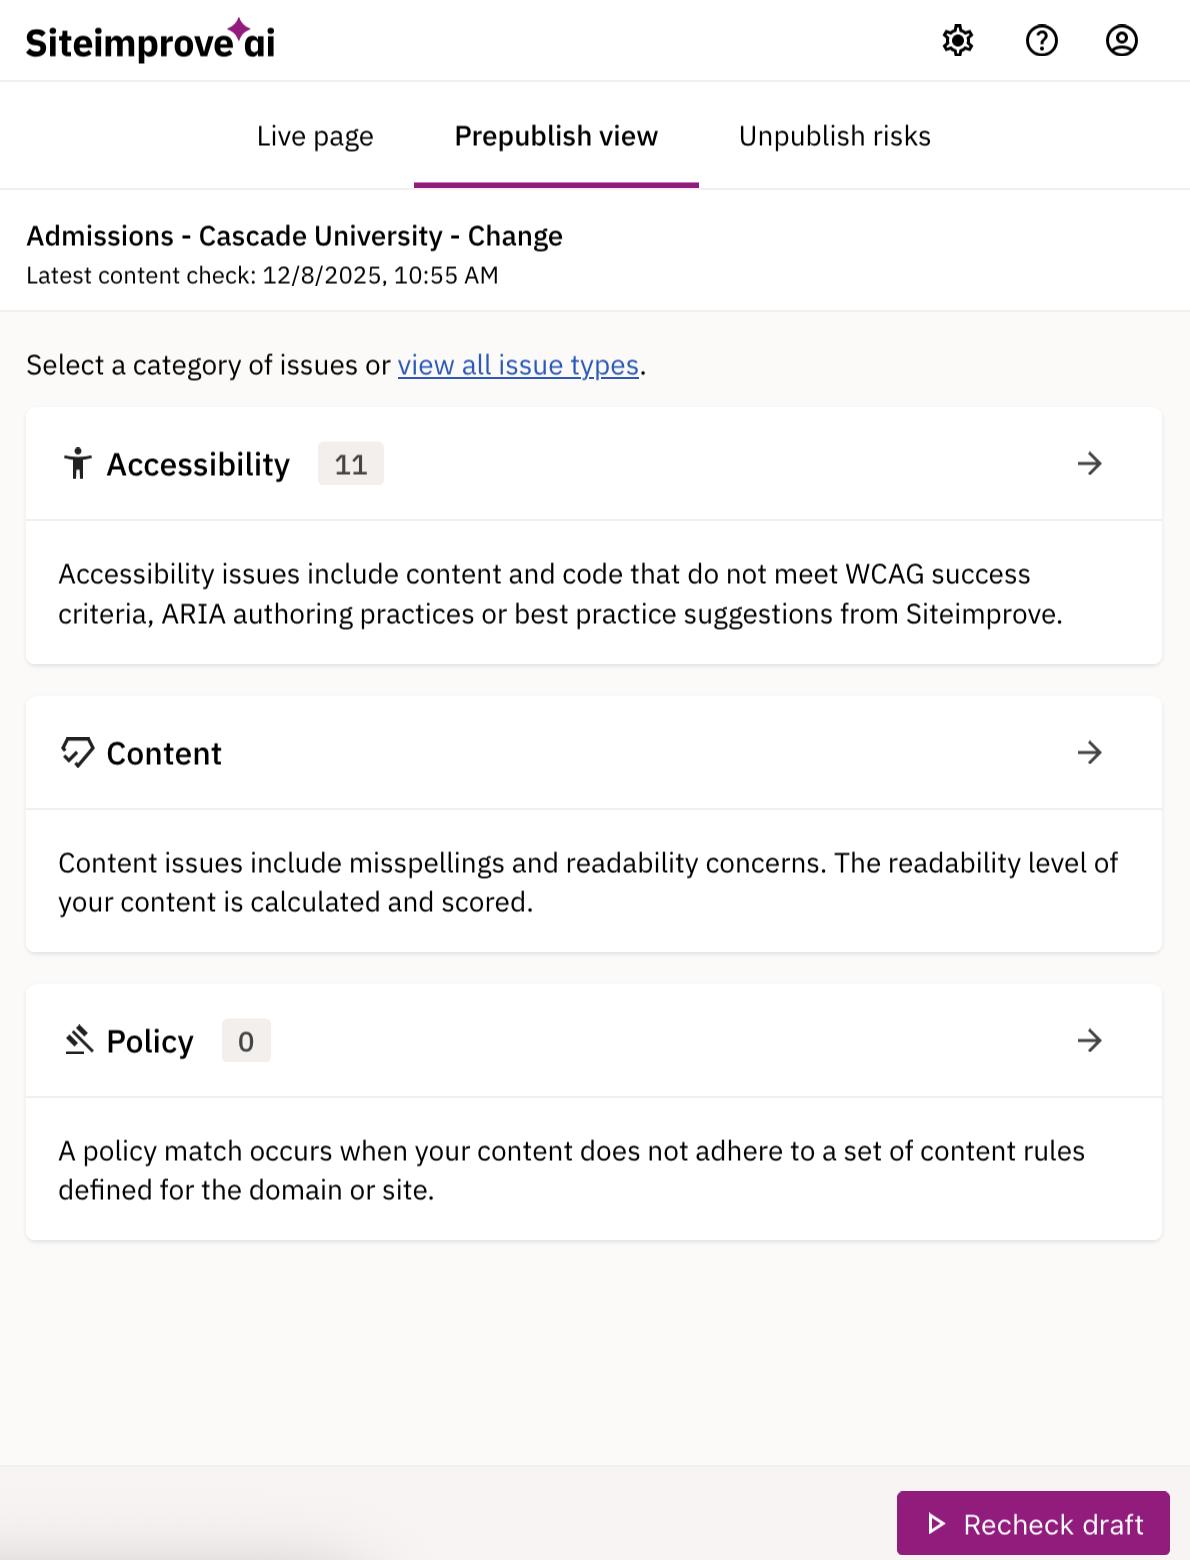
Once the Siteimprove Prepublish functionality is verified and submitted, you can perform Prepublish checks by clicking the Prepublish view tab within the plugin overlay. If you don't currently see any prepublish results listed, click the Run content check button at the bottom to generate results for the Page. For Pages with results already listed, you can click Recheck draft to update those results.
For issues listed, you can use the plugin to highlight where in the page content the issue appears and explore remediation guidance.
This option is available not only while viewing the current version of a Page, but also for previous Versions, Drafts, and Working Copies.