Migration Tool
Overview
The Migration Tool is available from Hannon Hill's GitHub repository:
To utilize the tool after startup, open a web browser and type in localhost:8081 in the address bar. You should see the following login screen.
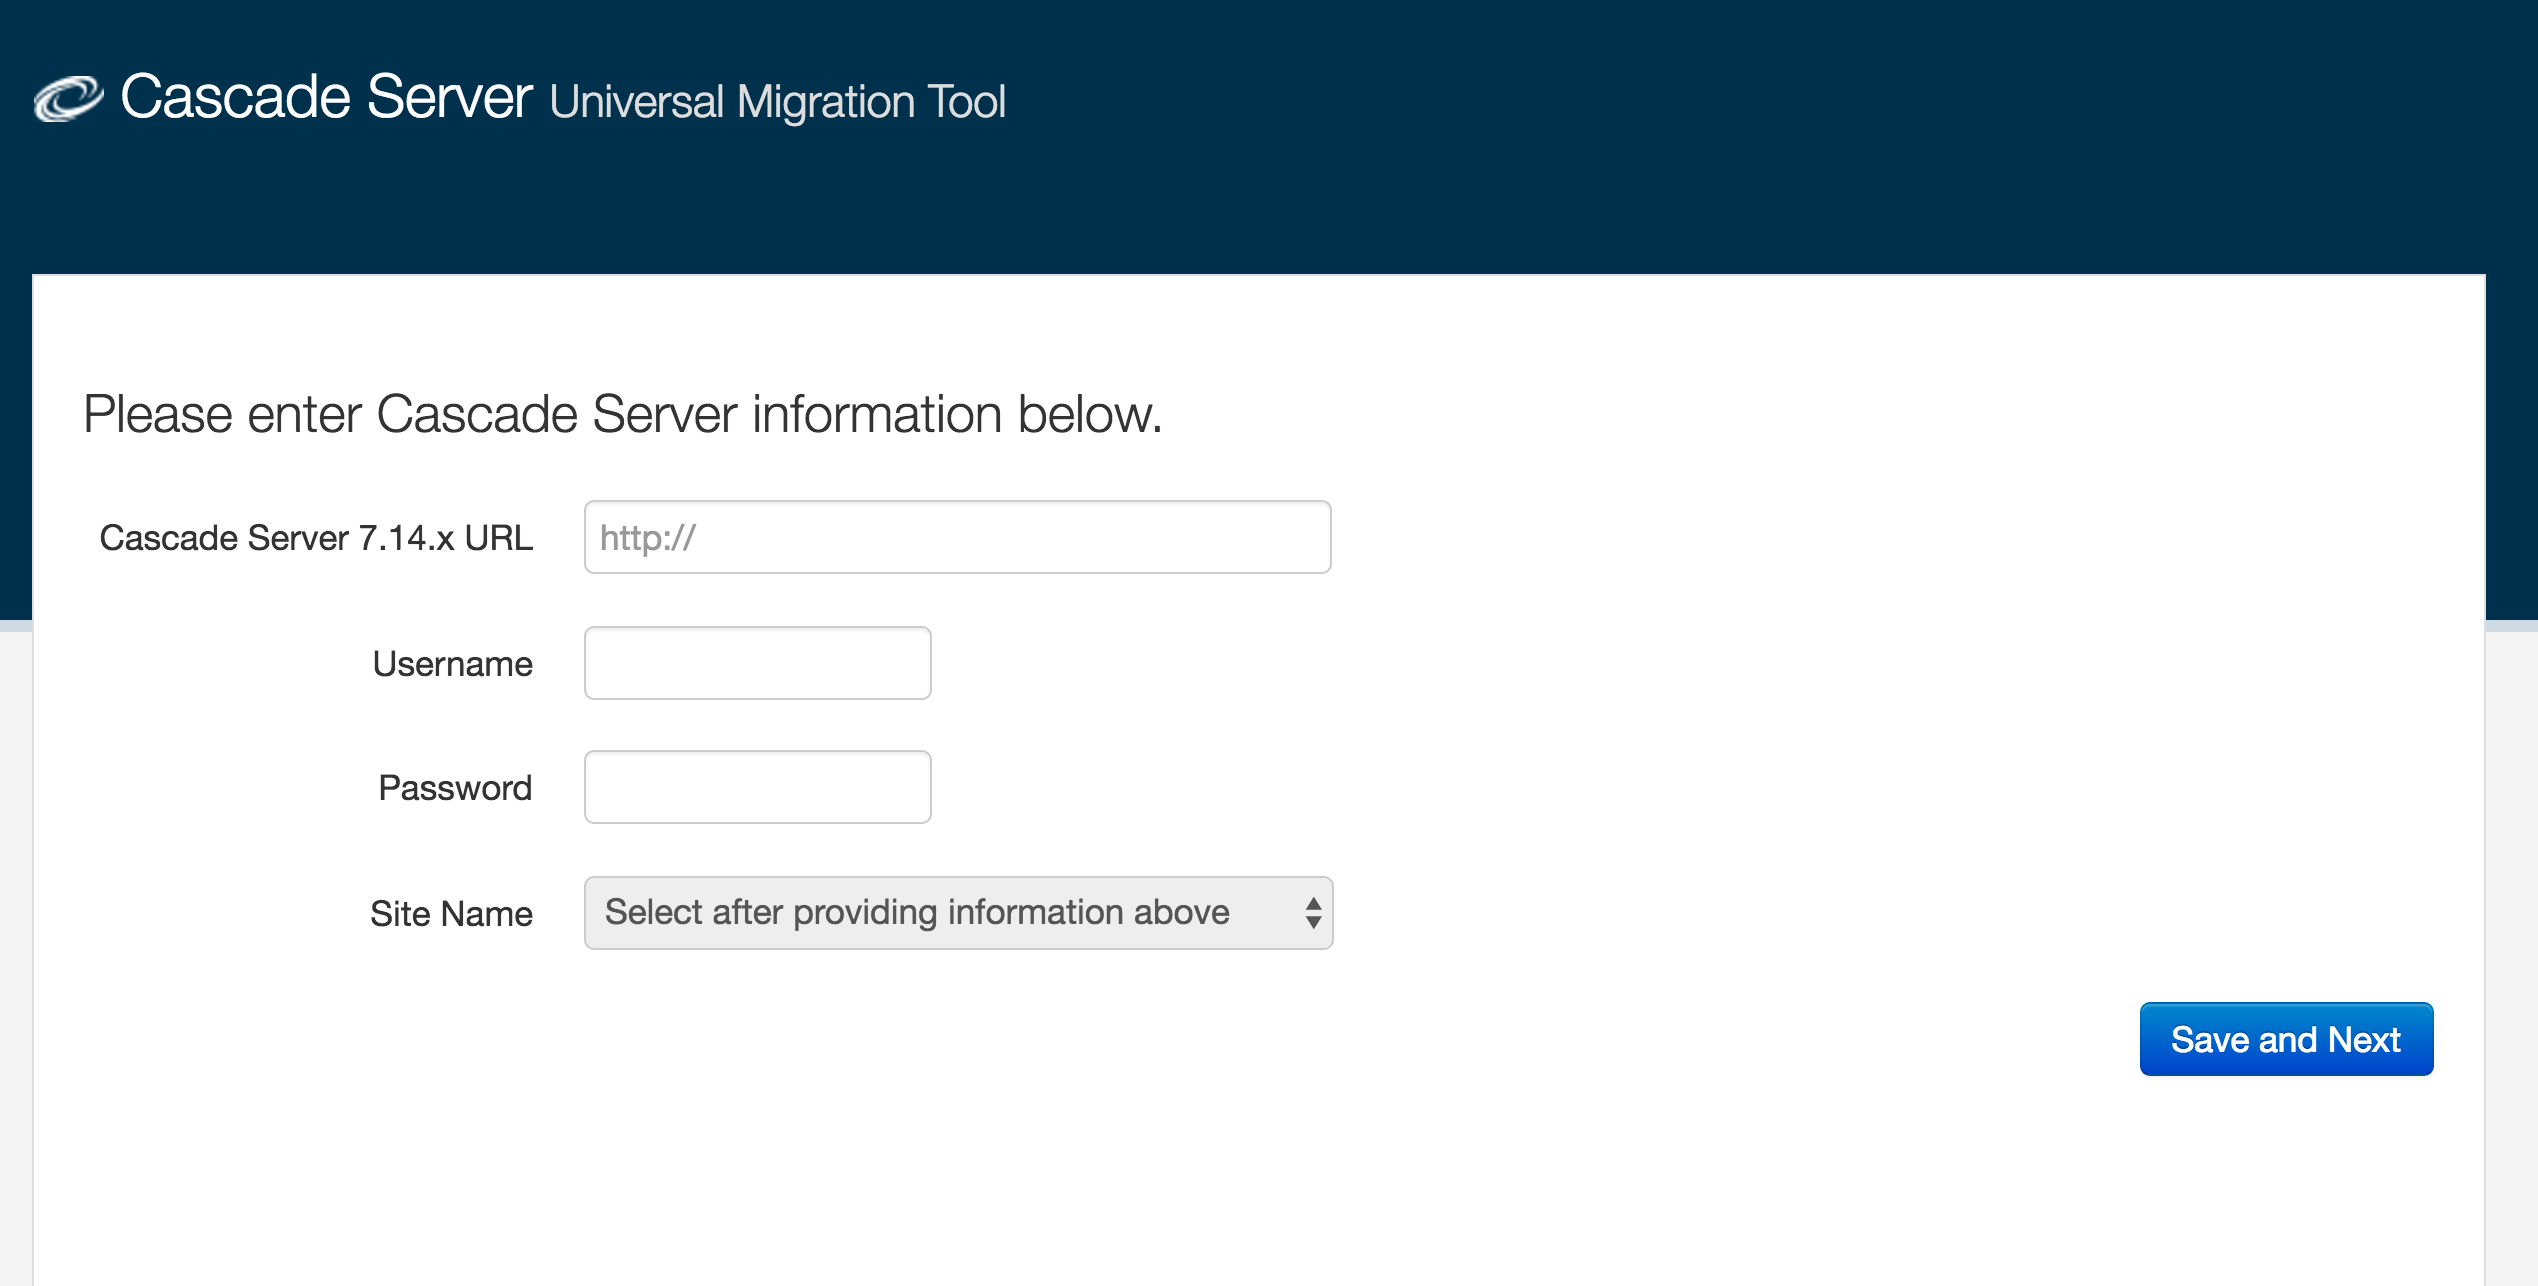
Type the fully-qualified URL to your Cascade CMS instance into the first field. You will then type your username and password in the following fields. The Site Name dropdown will then populate with sites that are available in your Cascade CMS instance.
Choose the site that you would like to migrate your content into and select Save and Next.
You will then be presented with the screen to choose content from your computer that you would like to migrate.
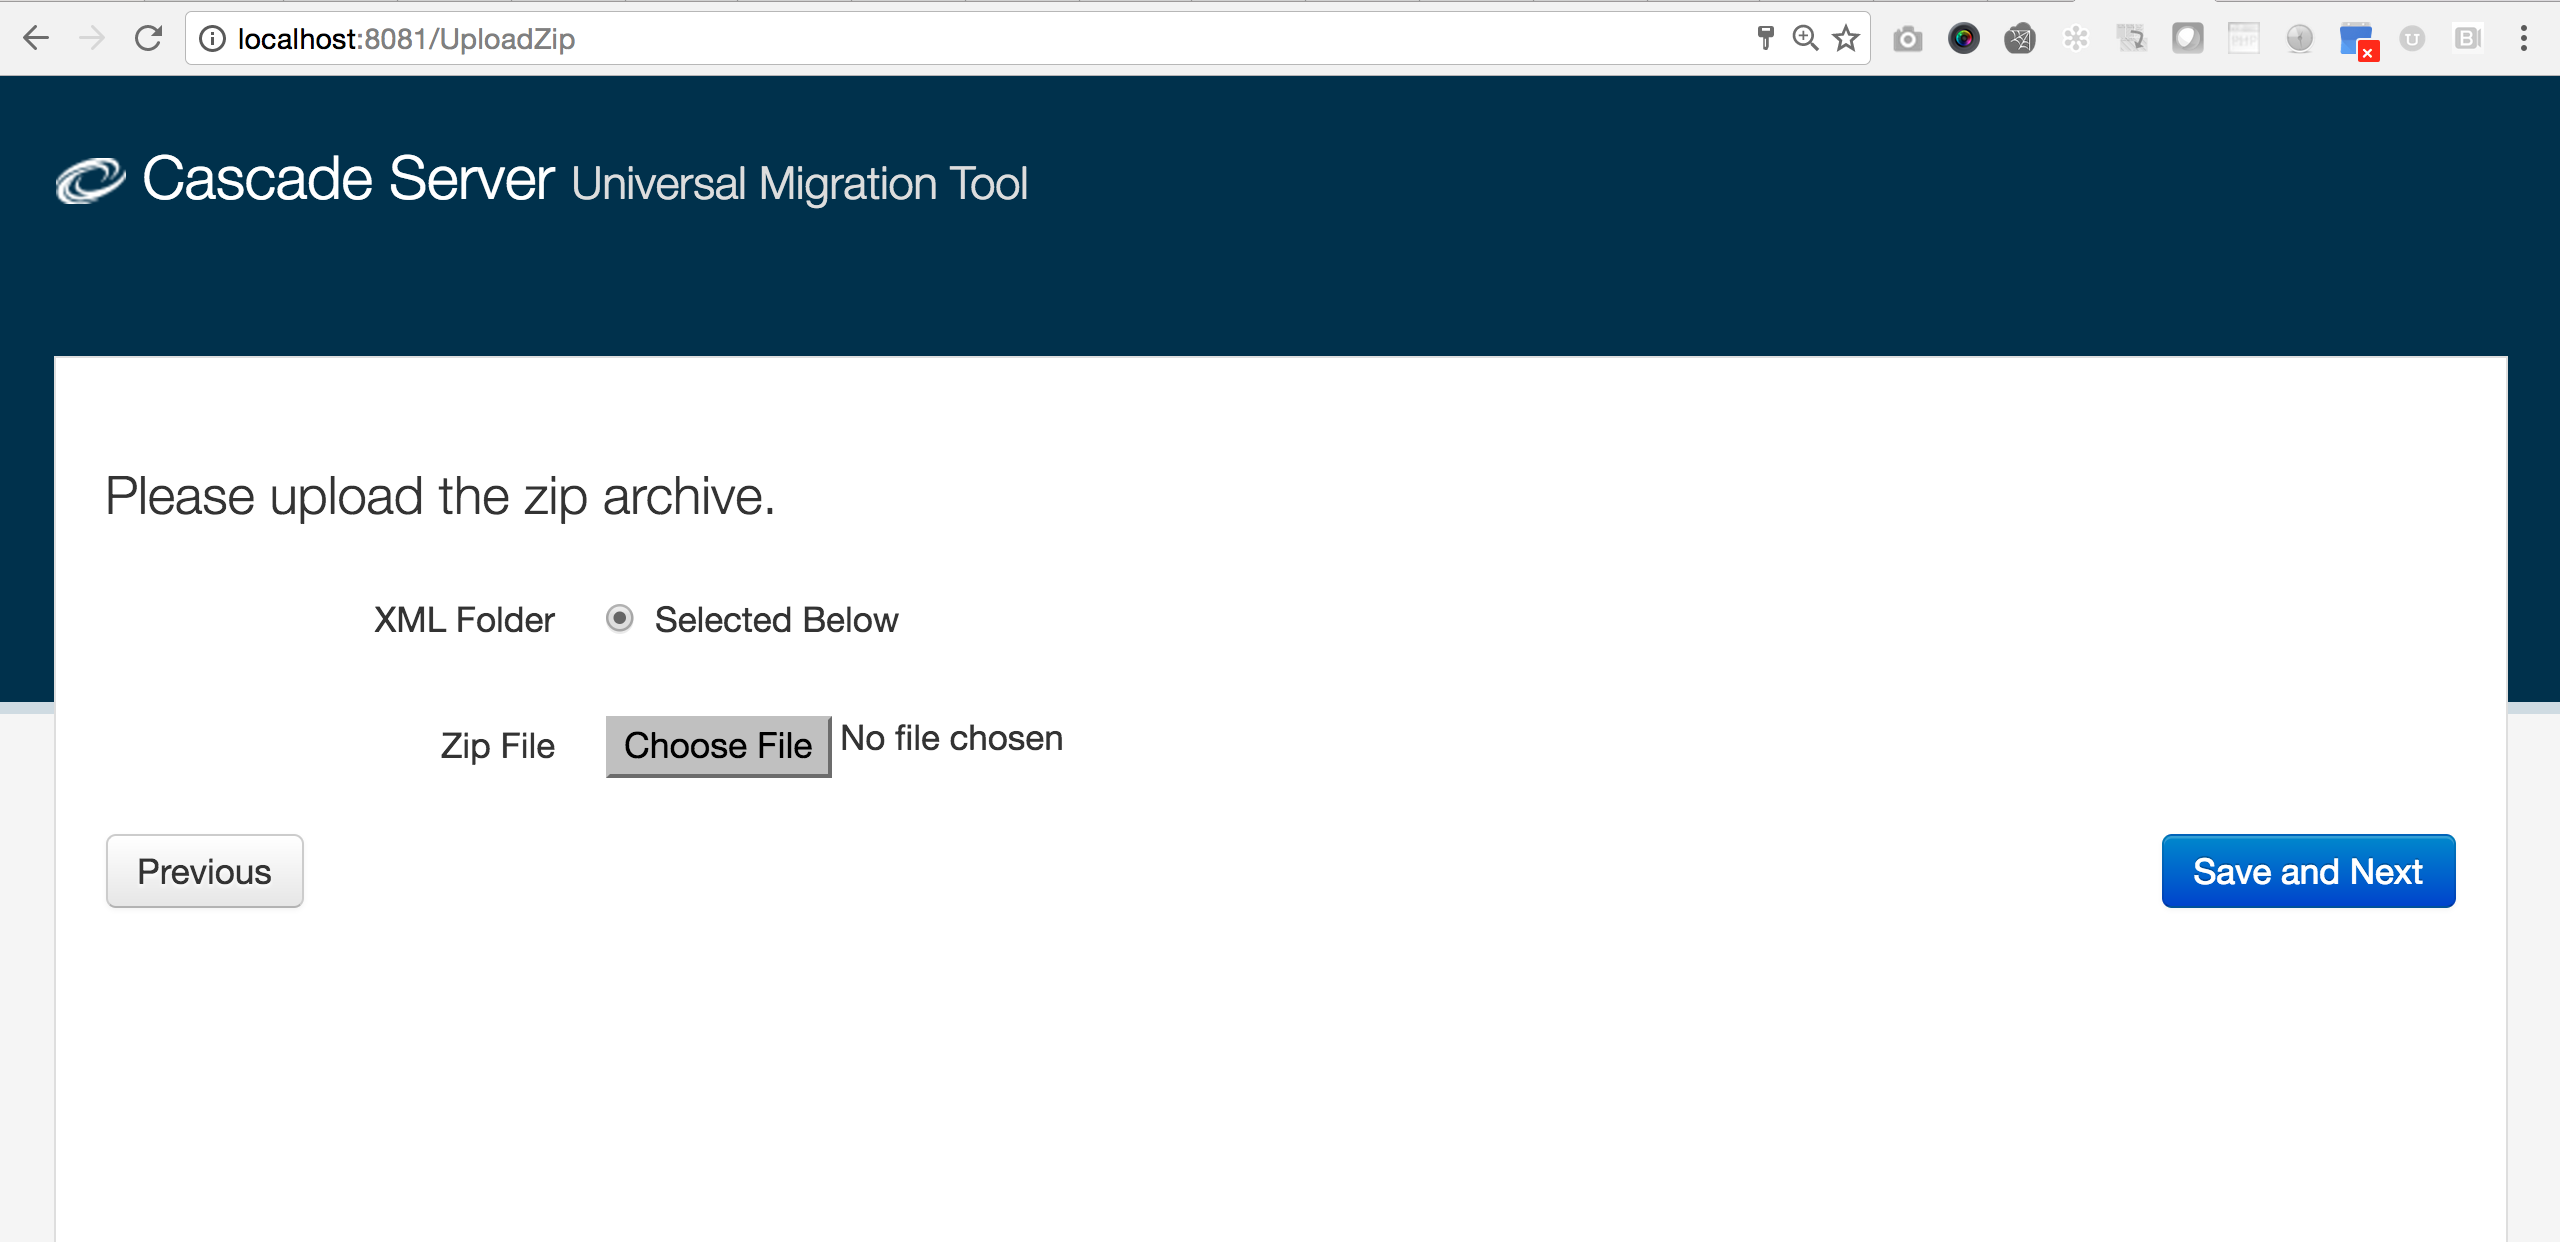
Click on the Choose File button to choose a zip of the files that contain the content for migration. Once selected, click Save and Next.
Note: If you have already utilized the Migration Tool, radio options will appear to work with previous batches of content.
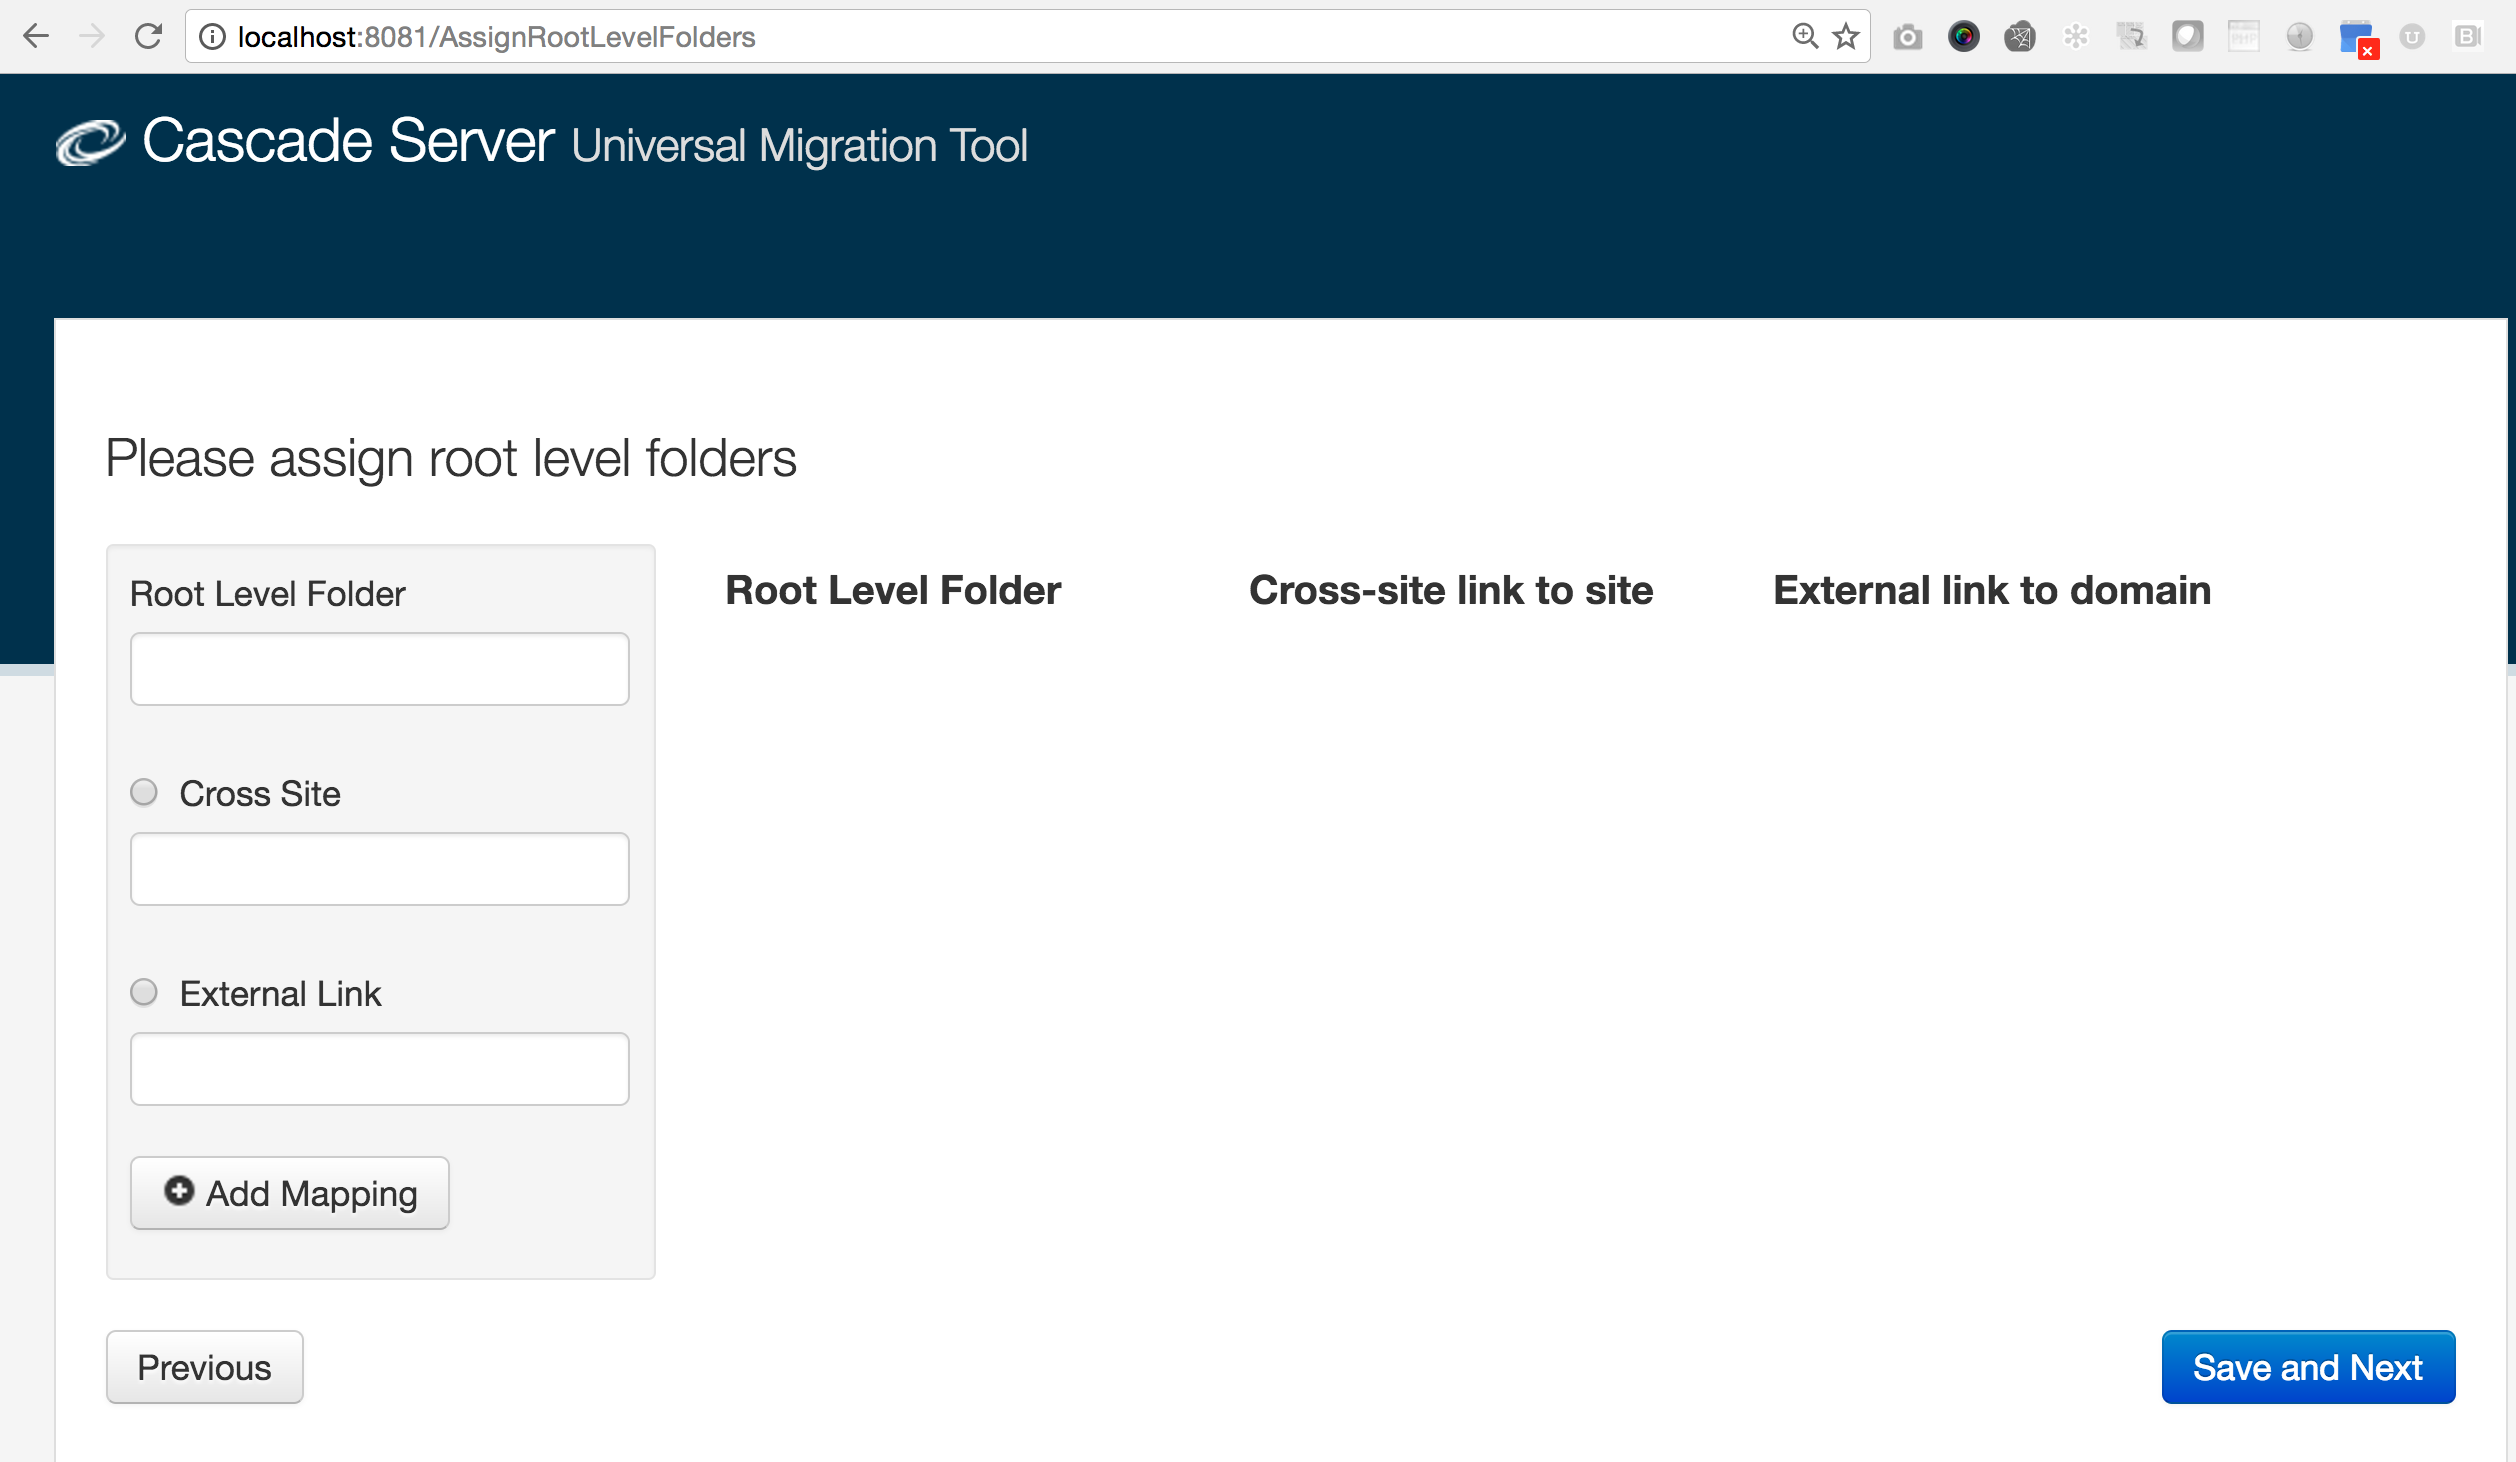
The above screen will allow you to map where links for sections of content that are not being migrated should point. This is often helpful if you are migrating sections of content where you may be referencing the section using a relative link. If you are migrating all of your content in one migration, you can skip this screen by clicking Save and Next.
If you have relative links in your content being migrated to content not being migrated, you will need to decide whether that section of content should point to a Cross Site link or an External Link.
Use Cross Site link if the content will be or has been migrated into another site in Cascade CMS. Use External Link if the content will be maintained outside of Cascade CMS.
If you choose Cross Site radio option, enter the Site Name. If you choose External Link radio option, enter the fully qualified URL.
An example of the above would be ../athletics/some/link.html appearing in your content being migrated.
If athletics section of your site will be managed in the Athletics site and migrated separately:
- Input athletics into the Root Level text box
- Select Cross Site
- Enter Athletics in the corresponding text box
- Select Add Mapping
If athletics section of your site will be managed external to Cascade CMS:
- Input athletics into the Root Level text box
- Select External Link
- Enter
http://fullyQualifiedURLforAthleticsSite(could even be something likehttp://yourdomain.edu/athletics) in the corresponding text box - Select Add Mapping
Once all of your mappings are complete, select Save and Next.
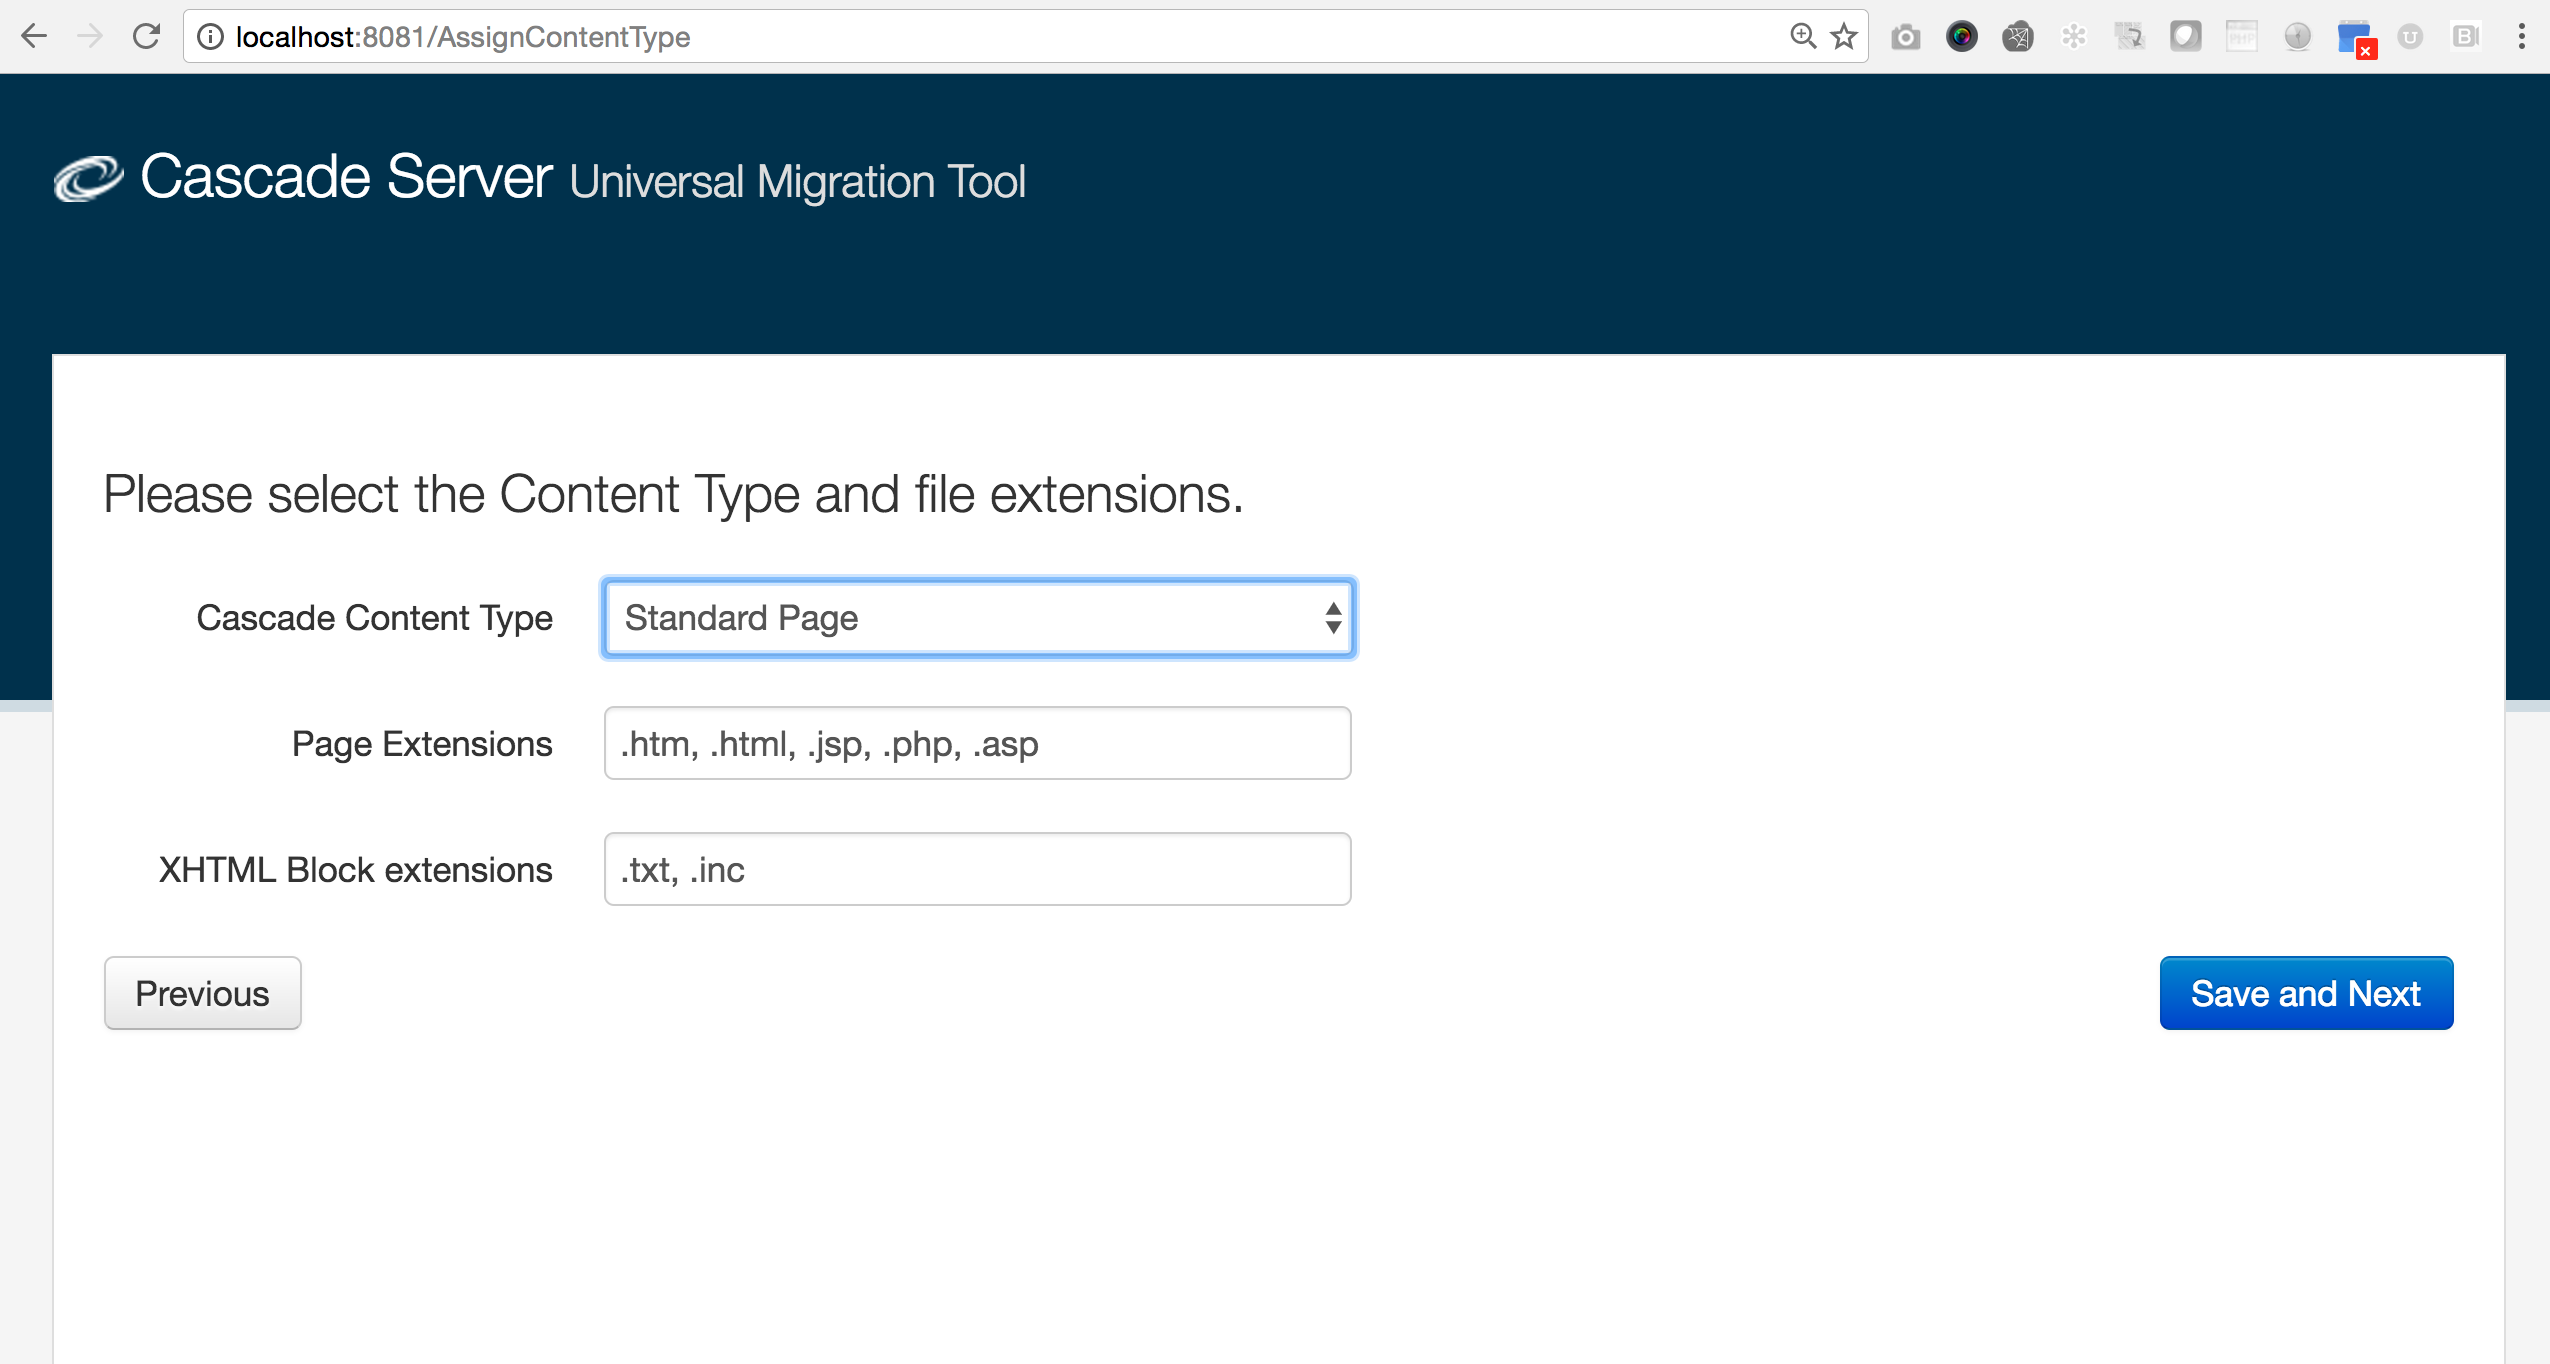
The above screen will allow you to choose the page type (Content Type) from Cascade CMS that you would like your content to import into.
Select the appropriate page type from the dropdown. In the Page Extensions text box, enter the extensions for the files in your content set that you would like converted to pages in Cascade CMS.
The XHTML Block extensions field allows you to map file types in your import to become Cascade CMS blocks. It is alright to leave this field blank if no content should be converted to blocks.
Once you have entered your selections, select Save and Next.
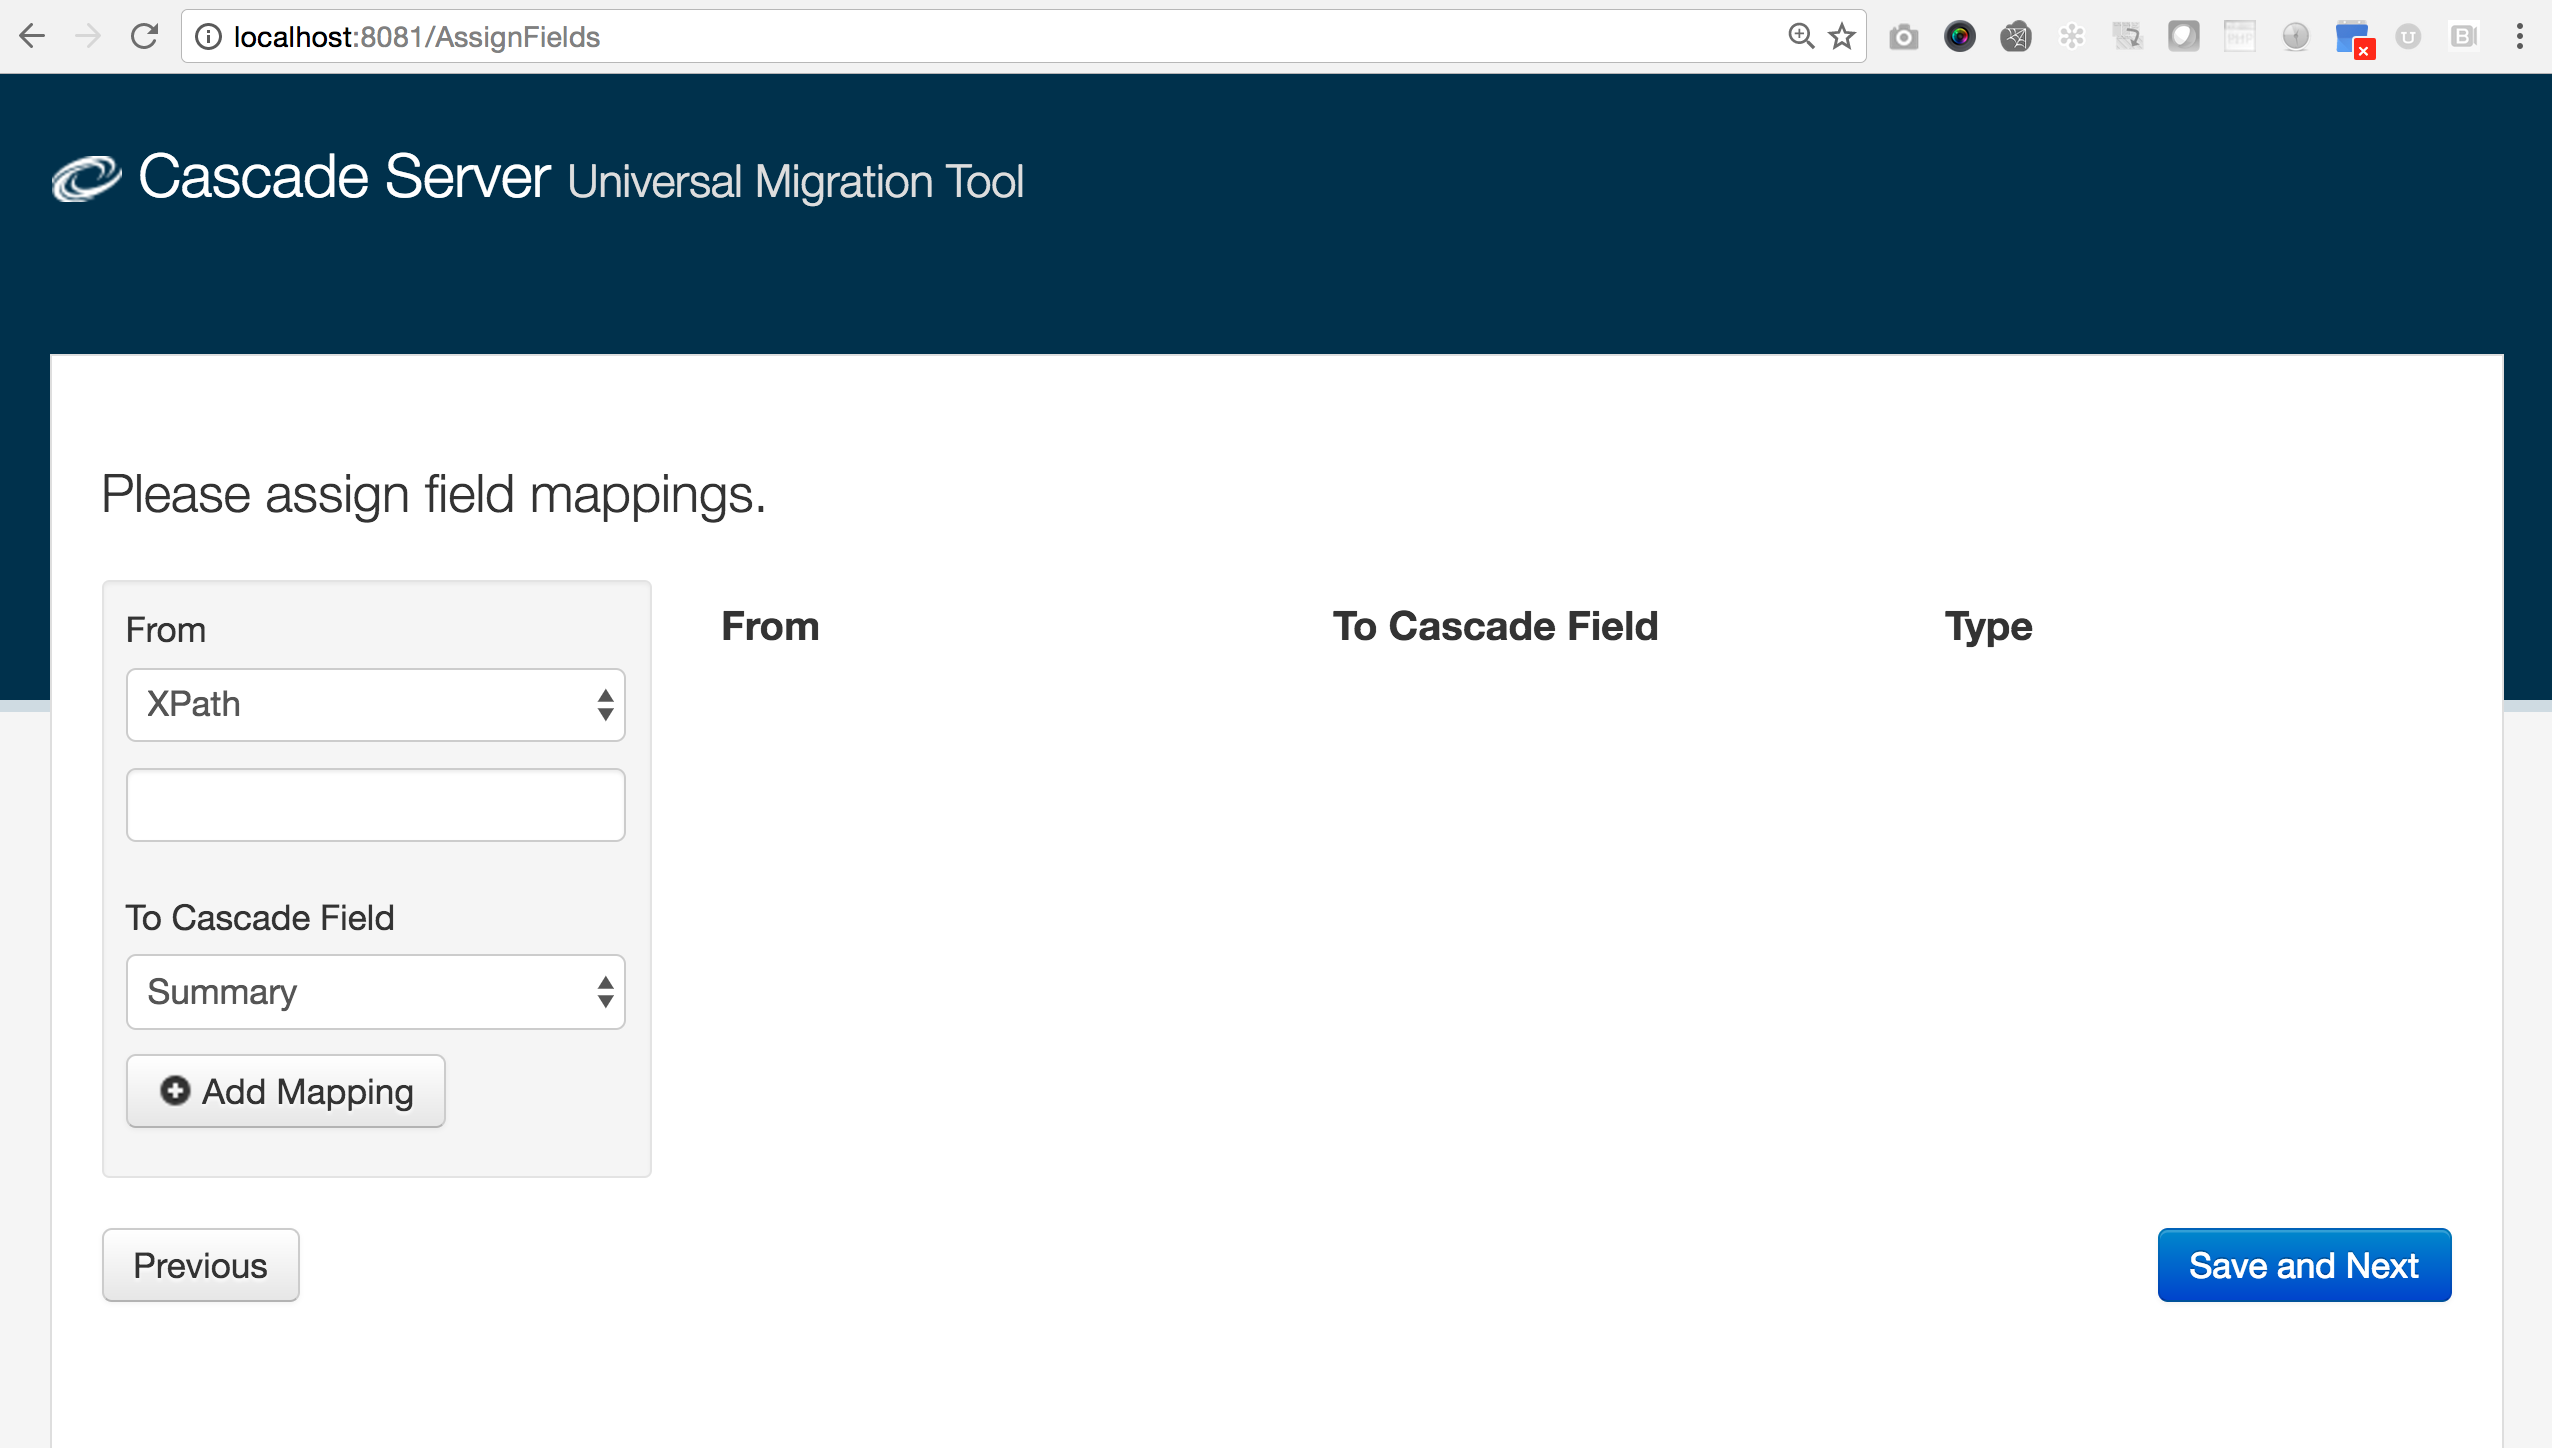
The above screen will now allow you to map specific sections of content to specific fields in your page type in Cascade CMS. You should use XPath to target specific areas of content within your page source code. You can learn more about XPath by reviewing tutorials about XPath. XPath is not native to Cascade CMS.
Once you know your XPath, fill it into the text box below XPath. Then select the field you would like the content mapped to in the To Cascade Field dropdown. Select Add Mapping. Repeat this process as many times as necessary until all of your content areas are mapped.
Static values can also be mapped to Cascade CMS fields. Simply change XPath in the dropdown to Static Value. You will then fill in the content you would like mapped to the Cascade CMS field in the corresponding text field.
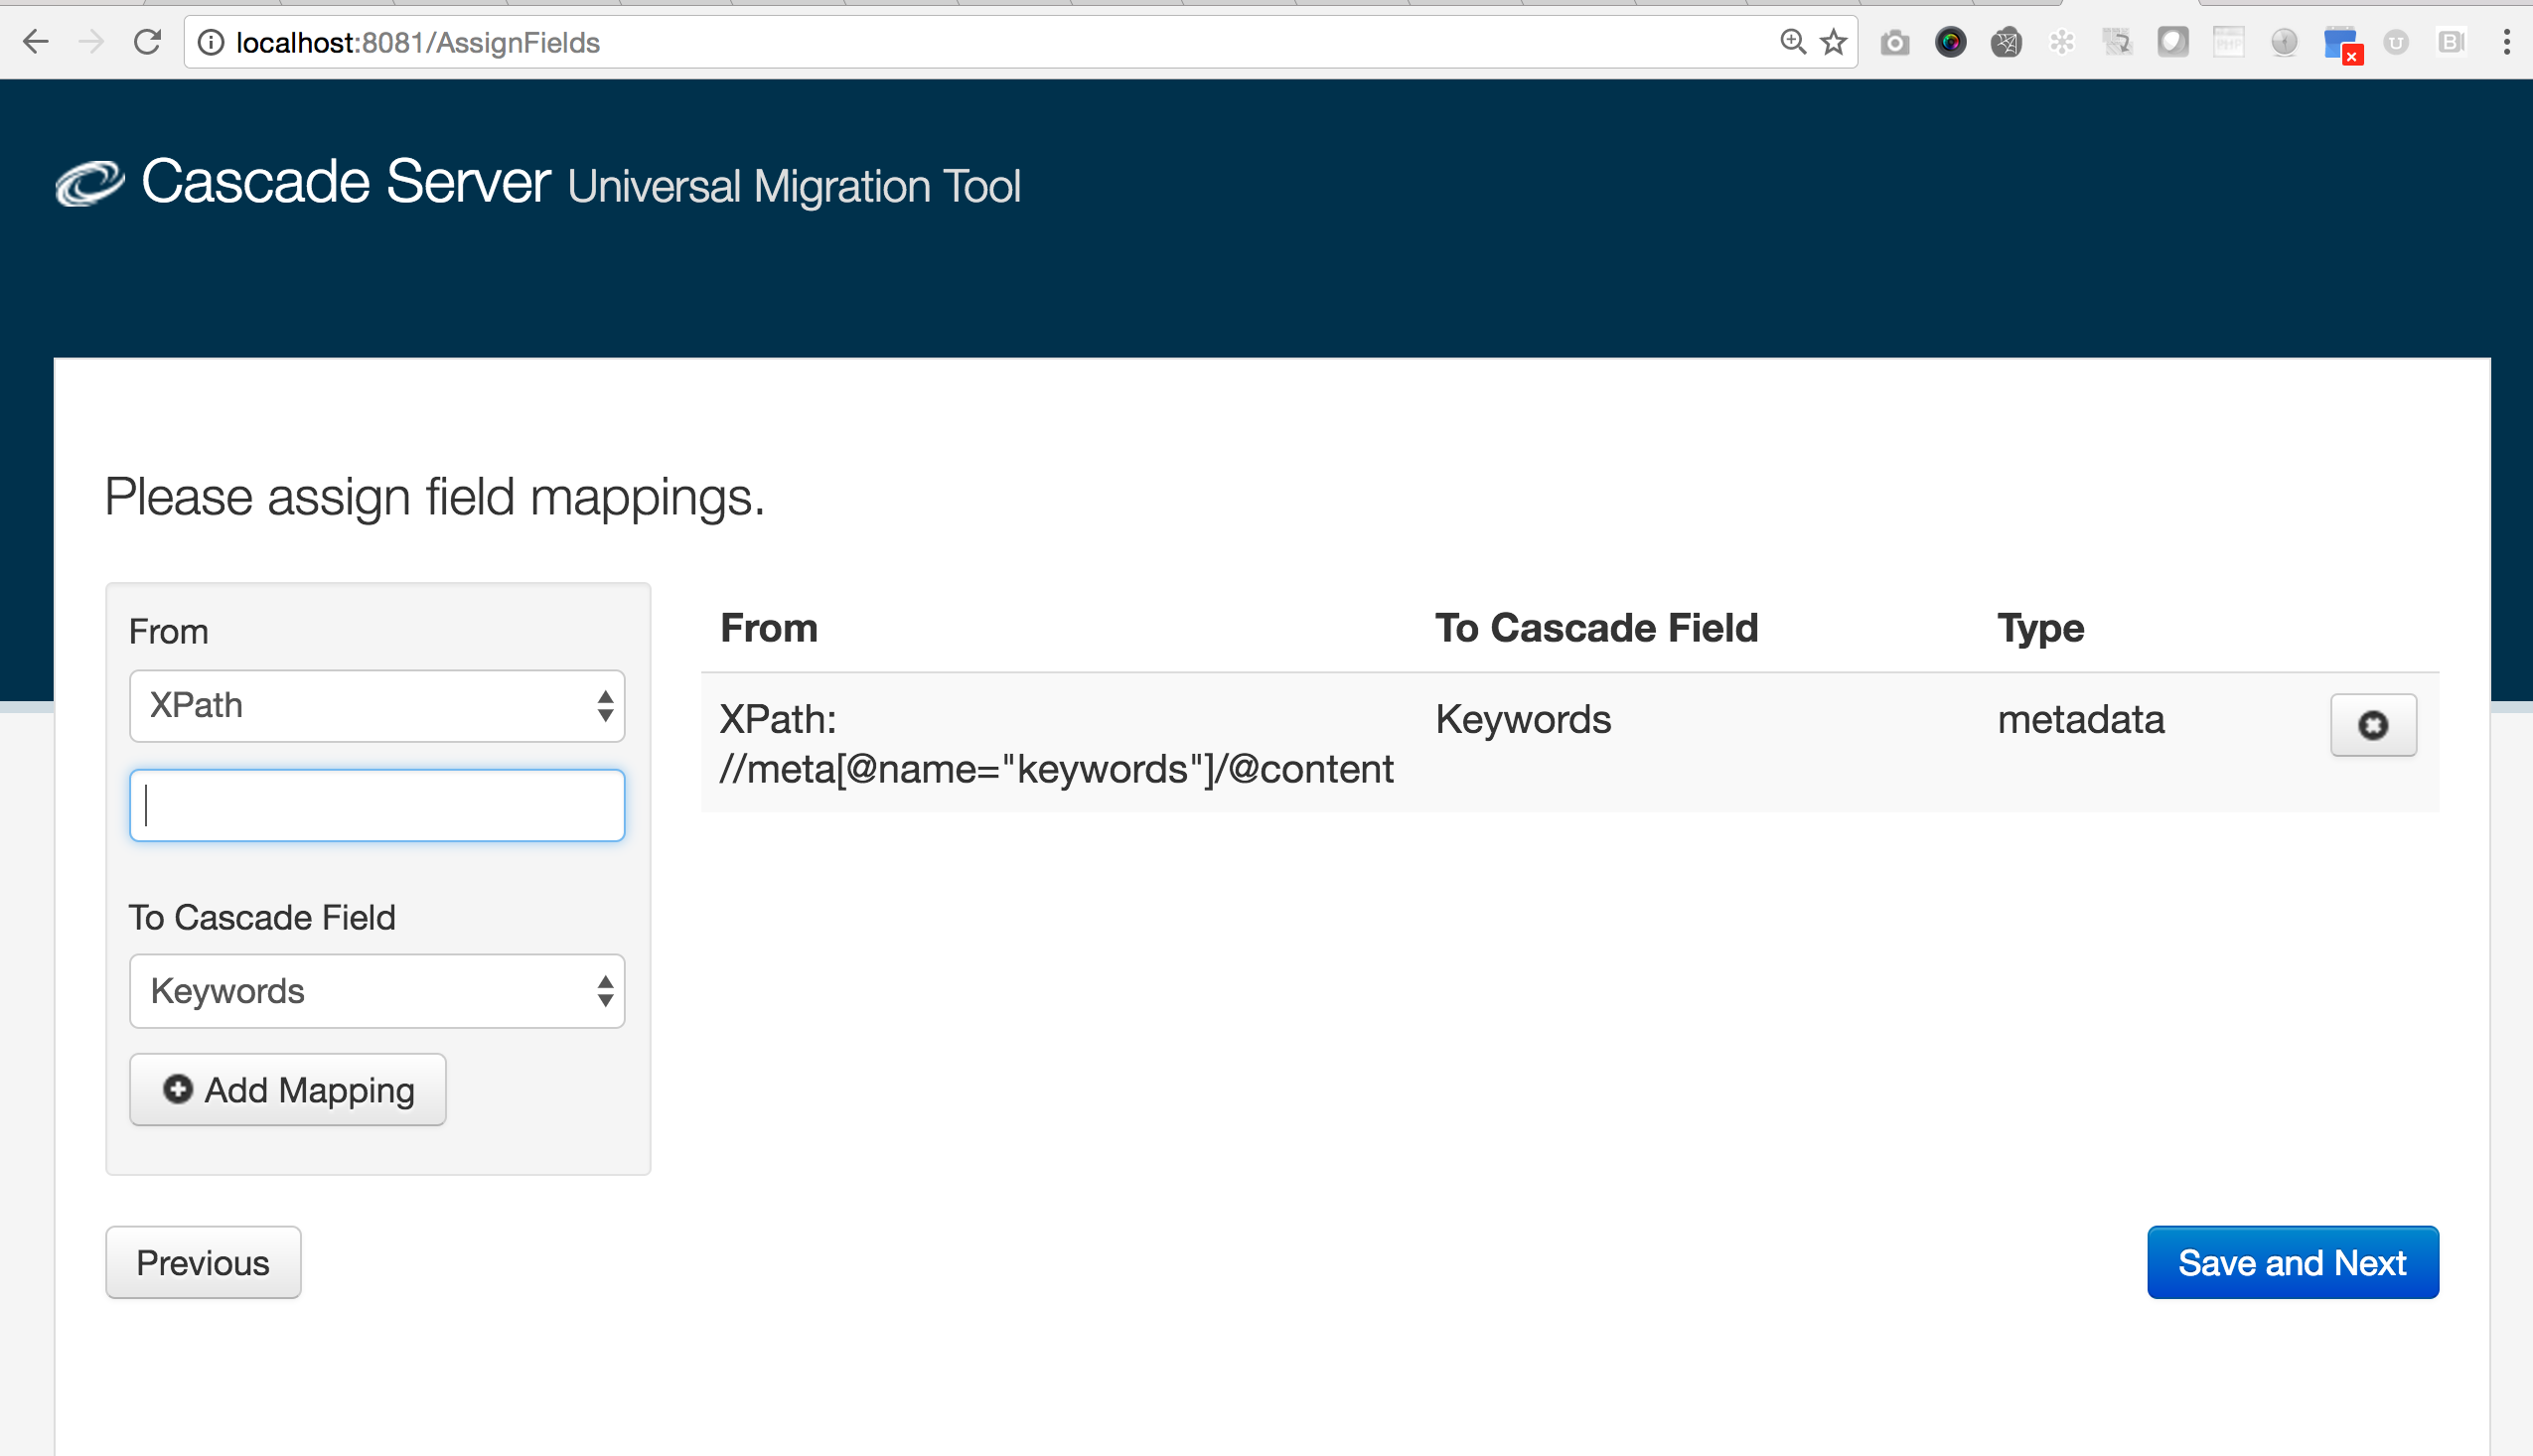
Three common mappings are for title, keywords, and description in the head of an html page.
The following XPath can typically be used for those fields:
- Keywords: //meta[@name="keywords"]/@content
- Description: //meta[@name="description"]/@content
- Title: //title/text()
To map images to File chooser fields:
- Target the element containing the
srcattribute that points to the image (do not target thesrcattribute directly) - Ensure that the source files use relative image paths
Once all are mapped, select Save and Next.
The next screen will be the summary screen. The summary screen will present you with all of the information for what you selected to migrate. It will also have four different options for migrating content.
-
- This option is typically used if you have not migrated content to the site yet. This is great for testing mappings because it will produce the fastest migration process. If you have already migrated content, you may not want to use this option since it will create duplicate pages for content already migrated.
-
- This option is typically used for migrating content if you have already migrated into the site previously and you needed to refine mappings. This will do a delete and recreate each page in the migration set.
-
- This option is typically used for migrating content if you have already migrated into the site previously and you needed to refine mappings. This will do an edit to the page in the migration set. Please note: all content in the page being remigrated will be updated, not just specific fields. This is advantageous in case you had created new content outside of this site that links to content being remigrated. It will prevent broken links in those cases.
-
- This option is typically used for migrating content that was left out of the original migration. Two commn use cases are the following: 1) You forgot to include a directory of content in your migration set and you have now added it into the original set of content being migrated. 2)There was a common error on pages being migrated that prevented them from being migrated. You have now fixed that error in all of the files and would like to rerun the tool over the migration set.
Once you have reviewed your mappings and selected the appropriate radio option, select Save and Next to start the migration process.
You will now see all of your files and pages being imported into Cascade CMS.