Content Inventory Report
Overview
The Content Inventory Report provides users with an overview of the assets contained within a Site. The report allows for Users to filter on various properties as described below.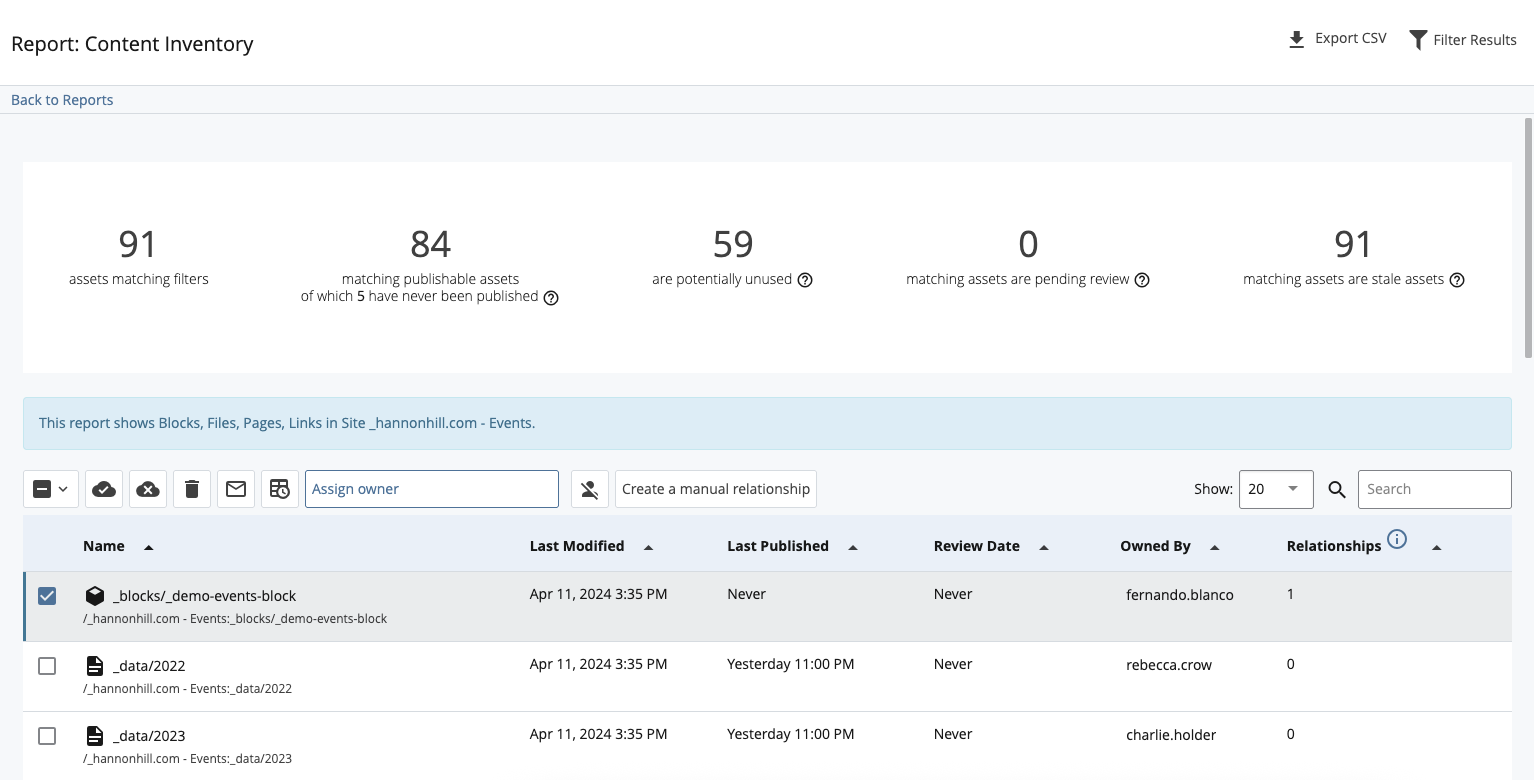
Filtering the Report
The following filters are available to refine the results of the report:
- Site - A Site must be selected to display report data.
- Asset Types - Select to display Blocks, Files, Pages, and/or Links. Additional filtering options are available to display those assets based on their indexing status, whether they are potentially unused, and/or if they are in an active Workflow.
- Publish Status - Select one of the following:
- any publish status
- are publishable
- are previously published
- have edits that have not been published
- are publishable but have never been published
- are not publishable
- Owner - Optionally select from the following:
- any owner
- owned by me
- selected owners (a chooser will appear to allow for multiple Users to be selected)
- no owner
- Review date - Optionally filter by various Review Dates.
- Last updated - Optionally filter by when assets were last updated.
- Restrict to folders - Optionally limit the results to assets within specified folders.
Assign Content Ownership
Assets can be assigned owners from the Content Inventory report or directly from the asset. When assigning content ownership, remember:- You must have write access to an asset to assign the content owner.
- You must share a Group with the User to whom you're assigning the asset or have the ability to view all Users.
To assign/unassign ownership of asset(s) from the report:
- Select one or more assets from the results list.
- To assign/re-assign ownership of asset(s), click Assign owner from the top of the list and select a User or click Choose myself to assign yourself ownership of the asset.
- To unassign ownership of asset(s), click the Unassign selected icon from the top of the list.
To assign/unassign ownership directly from the asset:
- While viewing the asset, click Details > Properties.
- To assign/re-assign ownership, click Choose User in the Content Owner field and select a User or click Choose myself to assign yourself. You can clear the assignment by clicking the "x" icon.
Identify Stale Content
The Content Inventory report can be used to display a list of assets that have not been modified within a specified time period. The definition of what content is considered stale is specific to each user, and only assets for which the user has write access are included in the results.
To identify assets that may be stale, use the Last updated dropdown to filter by items that were last updated within the following time periods:
- 30 days
- 60 days
- 90 days
- 120 days
- 360 days
Send a Stale Content Notification
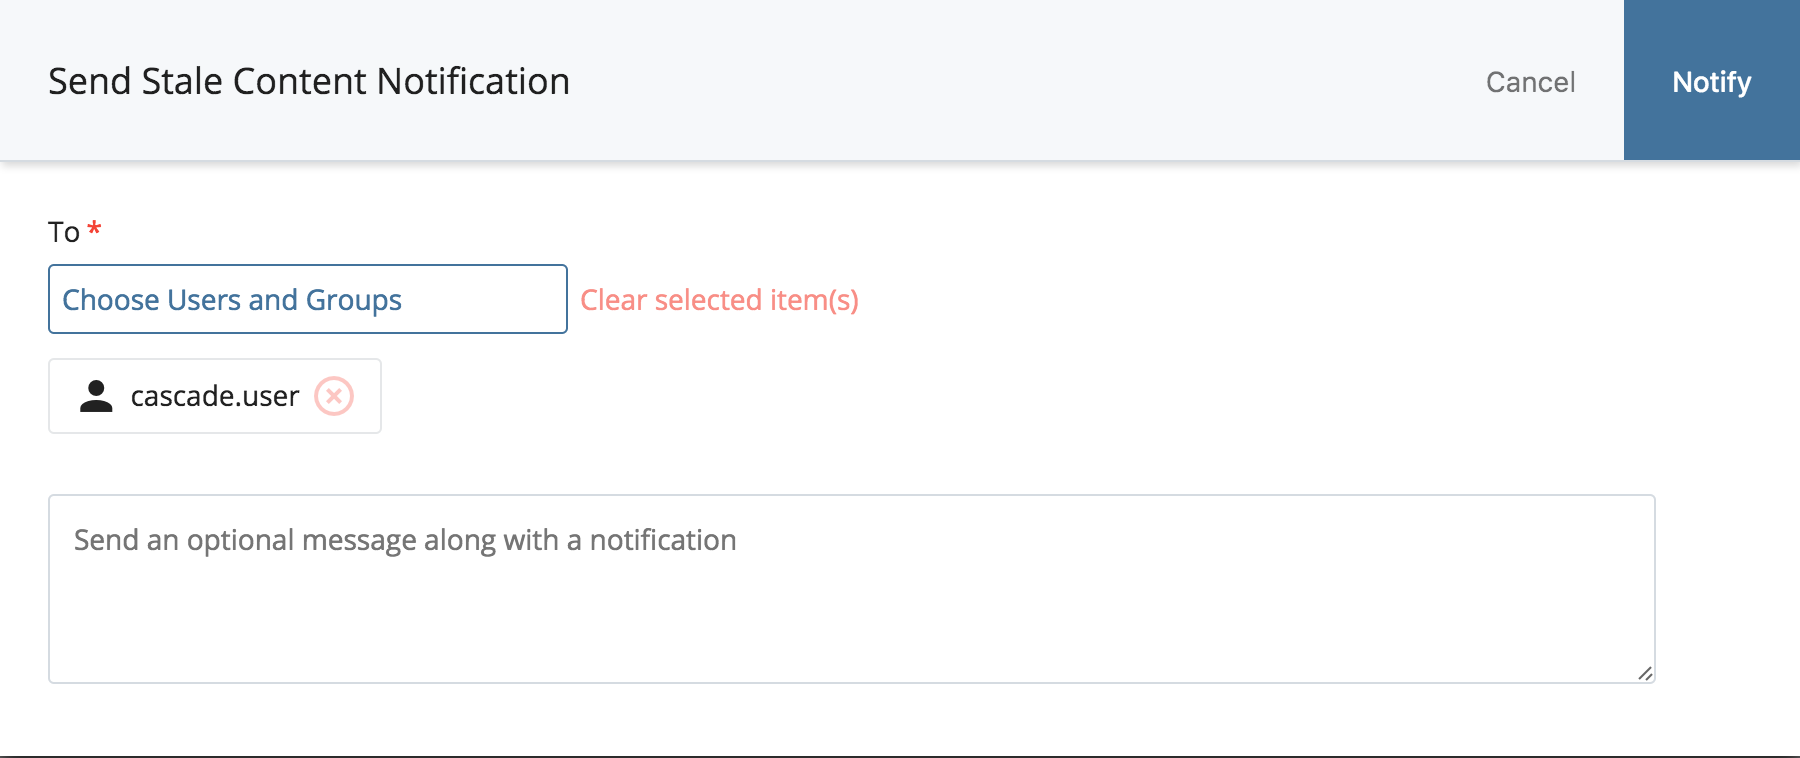
To send a stale content email notification:
- Select one or more assets from the results list.
- Click the Notify by Email envelope icon at the top of the list.
- Click Choose Users and Groups and select Users/Groups to receive the notification email. You may also enter a comma-delimited list of email addresses.
- Optionally, add a message to the notification recipients. By default, the system will send the user an email containing a brief description and link to the asset needing review.
- Click Notify. An email will be sent using the email options configured in your System Preferences.
Schedule a Review Date
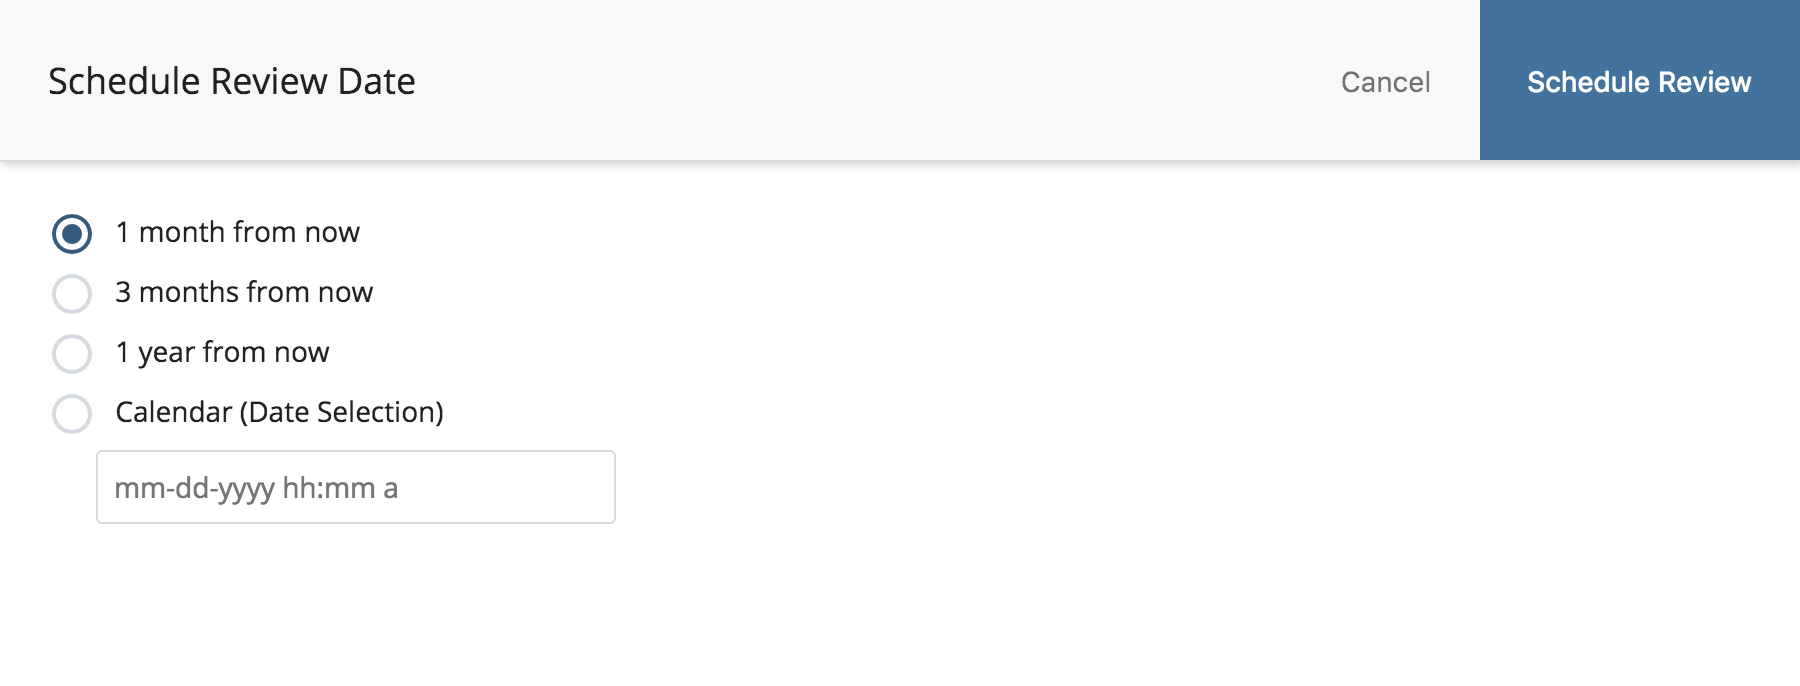
To schedule a review date:
- Select one or more assets from the results list.
- Click the Schedule Review calendar/clock icon at the top of the list.
- Select a date for future review. Options include 1 month, 3 months, 1 year, or a specific date.
- Click Schedule Review. This will update the asset Review Date metadata field to the specified date. Modifying an item’s Review Date does not change the item’s Last Modified date.
Identify Unused Assets
To see a list of suggested unused assets in the report, use the Filter Results button above the report and select the Show only assets that are potentially unused check box.
Assets listed in the results have no linked or manual Relationships with other assets in Cascade CMS; however, they may still be in use and/or linked indirectly via Format. For example, a news listing may link to news articles via the Query API, but the individual article pages may not have any Relationships.
If there are assets in the report that you know are in use but have no Relationships, you have the option to create a manual Relationship to an appropriate asset as described in the section that follows.
Create a Manual Relationship to an Asset
To create a manual relationship for an asset in the report:
- Select an asset from the list.
- Click the Create a manual relationship button at the top of the list.
- Click Choose publishable site content and select the asset(s) you wish to manually link to the current asset.
Unpublish Assets
To unpublish one or more assets in the report:
- Select one or more assets from the list.
- Click the Unpublish ( ) icon at the top of the list.
Delete Assets
To delete one or more assets in the report:
- Select one or more assets from the list.
- Click the Delete ( ) icon at the top of the list.